DOSE Classes and Co-op: How the Four Roles Combo
Four classes, eight survivors and a set of combos that only work when you play together. Here's how a DOSE crew fits, and what happens when someone goes down.
DOSE is a co-op game first. You can start a run on your own and let bots fill the empty seats, but almost every system we've built assumes there are other survivors next to you. The classes are the clearest example. Each one holds up fine on its own. Put two together and they start doing things neither can do alone.
Four classes, eight survivors
Right now there are four classes: the Glowstick, the Medic, the Scavver and the Rigger. Each one comes as a male and a female survivor, so you're picking from eight characters. Within a class they play the same. The choice is about who you want to look at for the next hour.
We gave every class a silhouette you can read from the isometric camera. The Glowstick wears a diving helmet with a glowing visor, the Medic a white and orange hazmat suit, the Scavver a hood and gas mask, and the Rigger welding goggles and a generator backpack. When a Brute is in the middle of your crew and half the street is on fire, you want to know who's who without reading a nameplate.
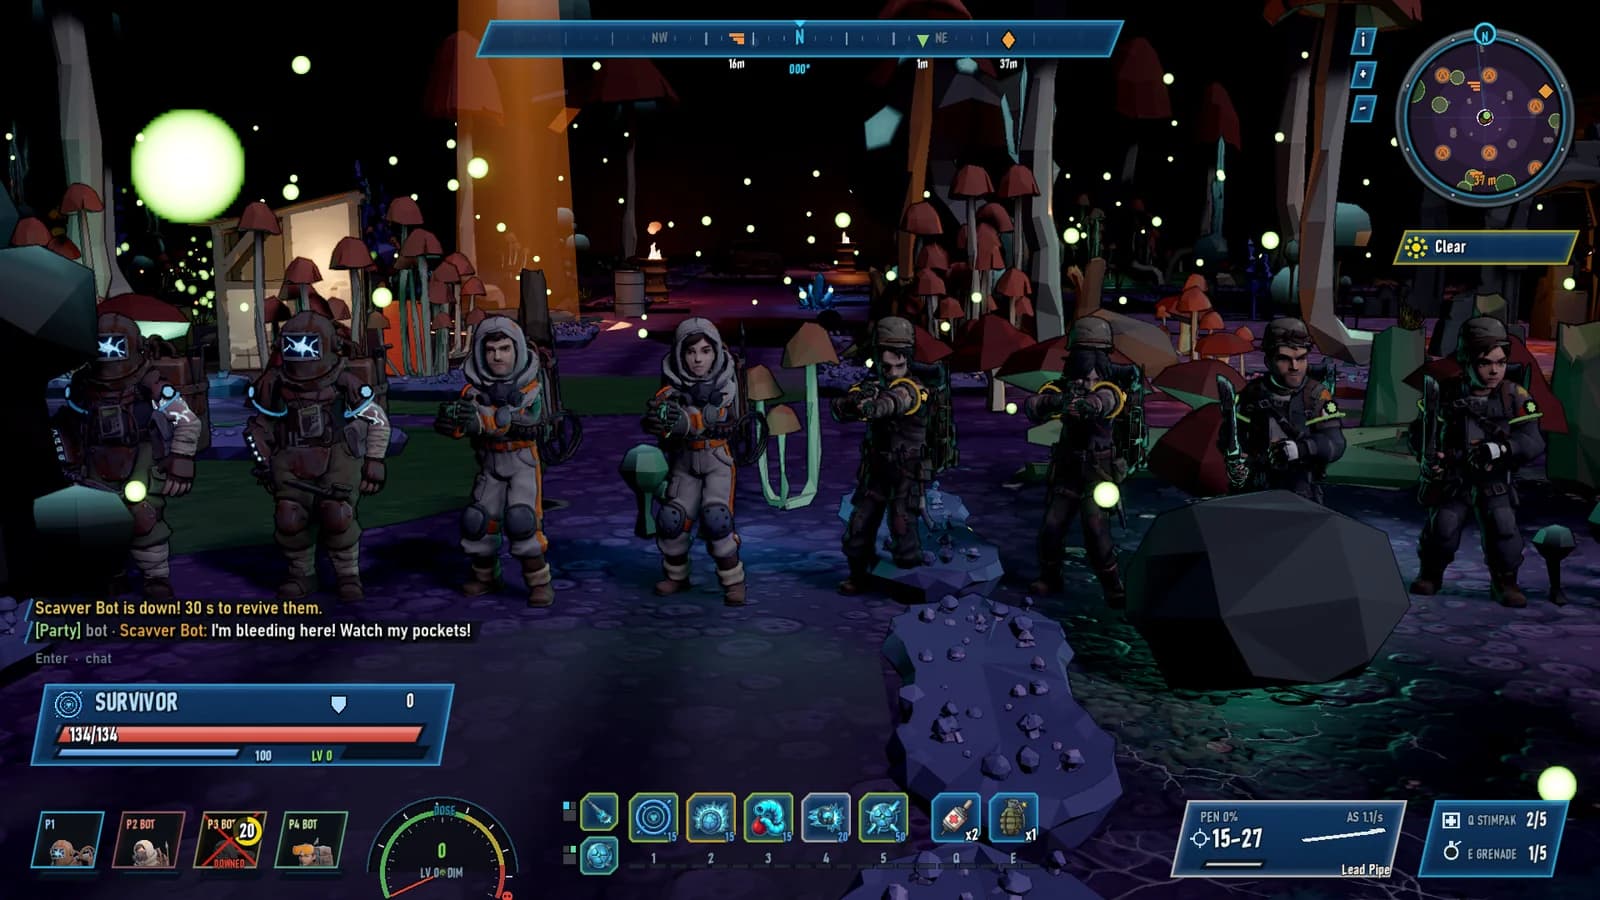
Every class has five skills on the number keys, a basic attack, and a right-click ability that costs no energy. Most skill slots also have an alternative you can swap in before a run, so two Scavvers in the same crew don't have to play alike.
What each class does
Glowstick (tank, radiation). The Glowstick has the most health of the four and its job is to be the thing monsters look at. Flare Up taunts everything within 9 metres and hardens you with Guard. Rad Pulse irradiates every monster around you. Even the basic attack leaks radiation: a quarter of each hit lands as rad damage, which half-ignores armour. There's also an alternative skill called Glowstick Siphon that pulls dose out of nearby crewmates and into you. Mutants hunt the brightest light, so a Glowstick who siphons is choosing to be the crew's lightning rod.
Medic (support, control). The Medic is the squishiest survivor and plays from range with a pistol. Sedative Dart hits everything within 2.8 metres of the target and stuns it for a second and a half. Stim Shot heals an ally for 45, and Rad-Away Field puts down a zone that heals and cleanses anyone standing in it. The big one is Second Wind, which heals every ally nearby for 60% of their health and pulls the downed back up.
Scavver (damage, armour piercing). Rifle, long range, and the answer to anything wearing plates. Aimed Shot ignores armour and leaves the target Exposed. Deadeye puts six armour-piercing shots into one target. The right-click Flare Mark tags a monster so it takes 10% more damage from the whole crew for 4 seconds.
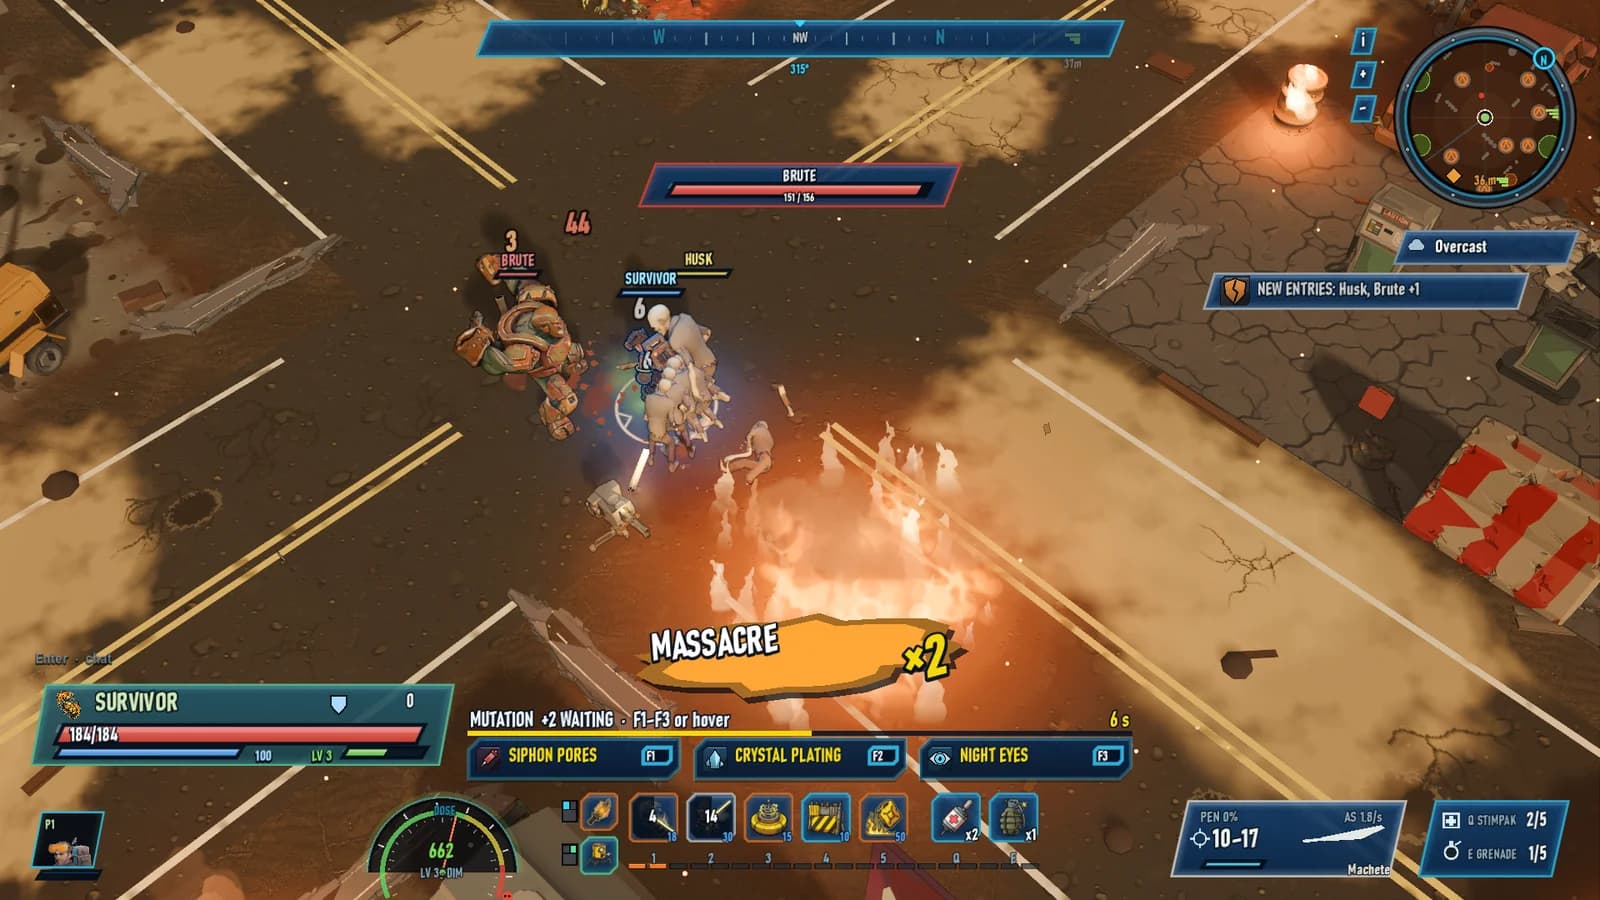
Rigger (engineer, fire). A machete up close and a bag of things that keep working after you walk away. Molotov leaves a burning pool. Auto-Turret shoots anything that wanders near it for 8 seconds, Tesla Mine stuns whatever steps on it, and Scrap Barricade plugs a gap. Napalm Line is a 12 metre wall of fire. Husk swarms take double damage from fire, so a crew without a Rigger struggles when they show up.
The combos that hold a crew together
The combos are the reason we built four classes instead of four flavours of damage. Each one needs two different people doing their part, and the game tells you about them right on the skill tooltips.
Meltdown: irradiate, then burn
Anything the Glowstick irradiates is primed. The next fire hit on it sets off a Meltdown, a blast that does 40 damage to everything within 3.5 metres. The Glowstick Rad Pulses into a pack, the Rigger throws a Molotov on top, and the whole group goes up. Fallout Cloud and Gamma Lance irradiate as well, so a Rigger who drags a Napalm Line along the lance's path can set off a Meltdown chain down the entire line.
Exposed: strip the armour
Brutes and bosses are armoured, and a lot of your damage just bounces off them. Aimed Shot leaves a target Exposed for 3 seconds. While it's Exposed its armour is zero and it takes 25% more damage from everyone, not only from the Scavver.
Caught: stun it, then crit it
Any stunned or rooted monster counts as Caught. The Scavver hits a Caught target for 1.5 times the damage, and Spitters that get Caught take double. The Medic's Sedative Dart is the usual setup, but the Rigger's Tesla Mine, the Glowstick's Meltdown Charge and the Scavver's own Bear Trap all work too. Ricochet is the fun one. Every bounce gets the crit, so stun a pack first and then bounce a round through it.
Lightning Rod: keep the tank standing
When the Medic heals a Glowstick, the heal lands at 1.5 times its normal value. That lets a Glowstick under Flare Up hold a taunted pack far longer than it should, while everyone else does the damage.
We wanted each class to own a counter role, and the lobby checks for it. Skip the Scavver and it warns you that Brutes and the boss will stay armoured. You can ignore the hint. It's there so the first Brute isn't a surprise.
Going down, getting up, getting dragged out
When your health hits zero you don't die straight away. You go down, and a 30-second bleed-out clock starts. A crewmate has to stand right next to you for 3 seconds to revive you, and you get back up with 35% of your health. While someone is in range the clock pauses, so a reviver who gets chased off by a husk doesn't burn the time you had left. If the clock does run out, you're dead for the rest of the run. Second Wind skips the wait and brings back every downed survivor within 11 metres of the Medic at once.
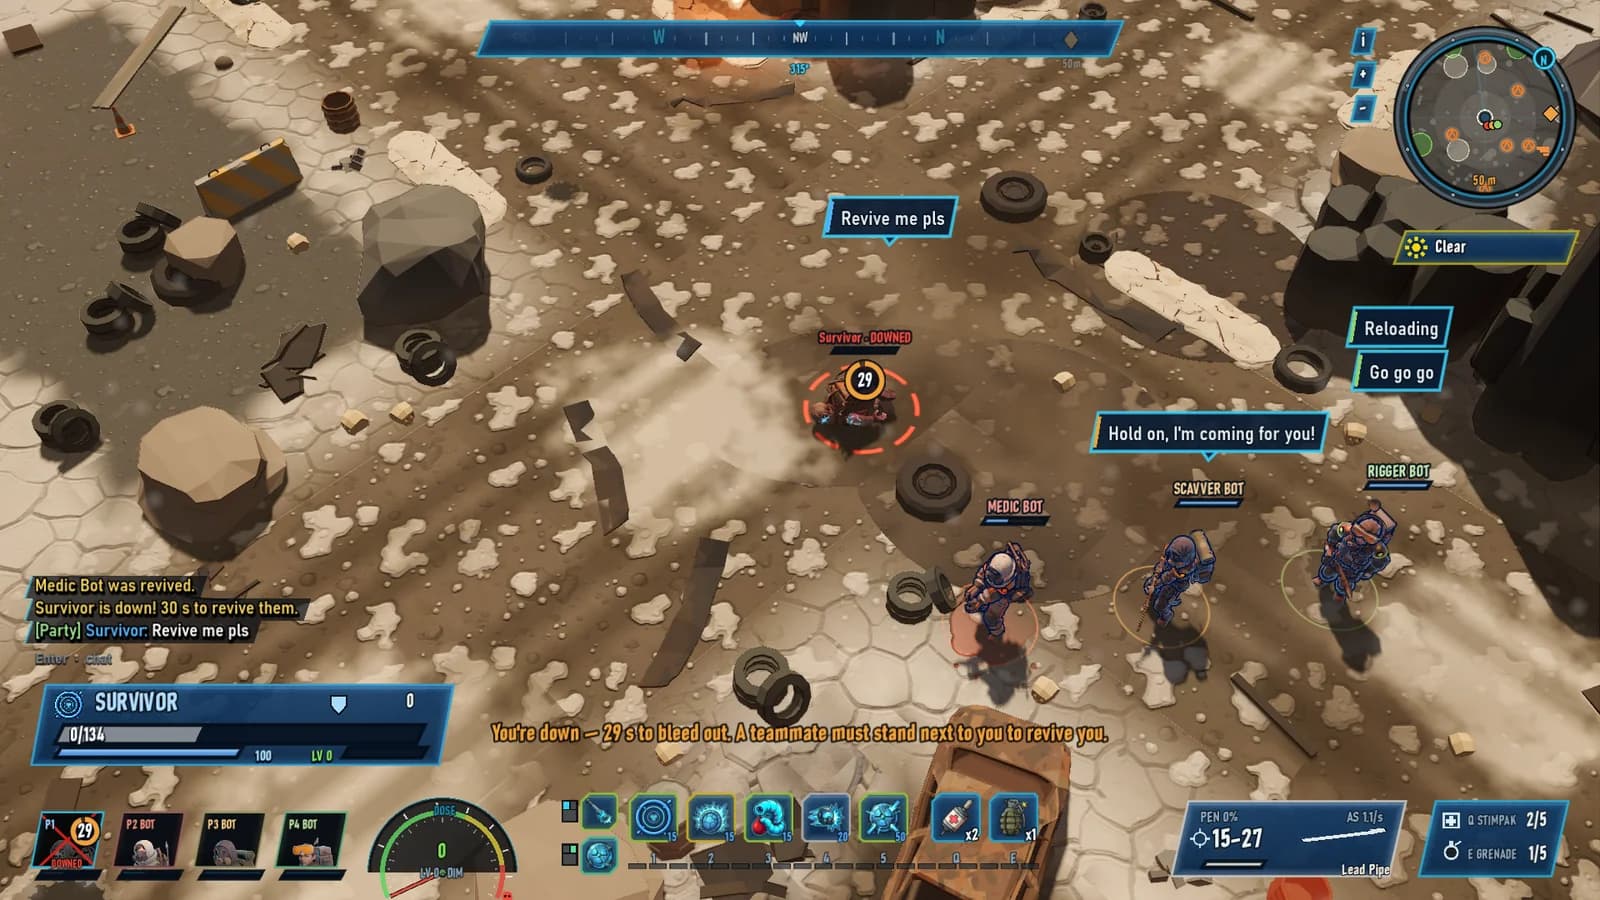
There's one more way out. Once someone lights the extraction flare, a downed survivor within 4 metres of a standing crewmate gets dragged along behind them. If you're still down inside the extraction zone when the run ends, you bank half of your dose instead of losing all of it. You don't count toward the crew bonus, though. That bonus is x1.1 when two survivors make it out, x1.2 for three and x1.3 when all four do, so a revive before the beacon is still worth a lot.
And if someone does die out there, their gear doesn't just vanish. It drops in a bag the rest of the crew can pick up and carry home.
Why DOSE is built for a crew
Being in a crew changes more than who revives you. Dose from kills gets shared between the survivors standing near the kill. Early on, everyone in range got the full amount. That sounded generous, but a full crew of four soaked up dose so fast that they'd be sick before they ever reached the beacon. Now each survivor gets 70% of a kill's dose in a pair, 60% in a group of three and half in a full crew. The crew as a whole still earns more per kill than a solo player does, but nobody cooks just for standing next to a fight.
Solo play has its own safety net. A survivor playing alone gets one Grit self-revive per run. You drag yourself up after 3 seconds with 60% of your health, and the shock of it stuns and knocks back every monster around you.
We'll be honest about the bosses, though. A solo player can reach and fight every one of them, but they're tuned for crews. Dungeon bosses are a rare solo win and extraction bosses alone are a very long shot.
Bots fill the empty seats
Any empty seat in the lobby can take a bot, and you choose its class. Bots follow the crew, use their skills, heal allies who are getting low, go looking for downed crewmates to revive and stand on the beacon when it's time to extract. They even talk in party chat, which we didn't expect to enjoy as much as we do.
They're there to make a small crew feel like a full one, not to replace friends. A bot won't change the plan mid-fight because it saw something you didn't.
From the lobby to the drop
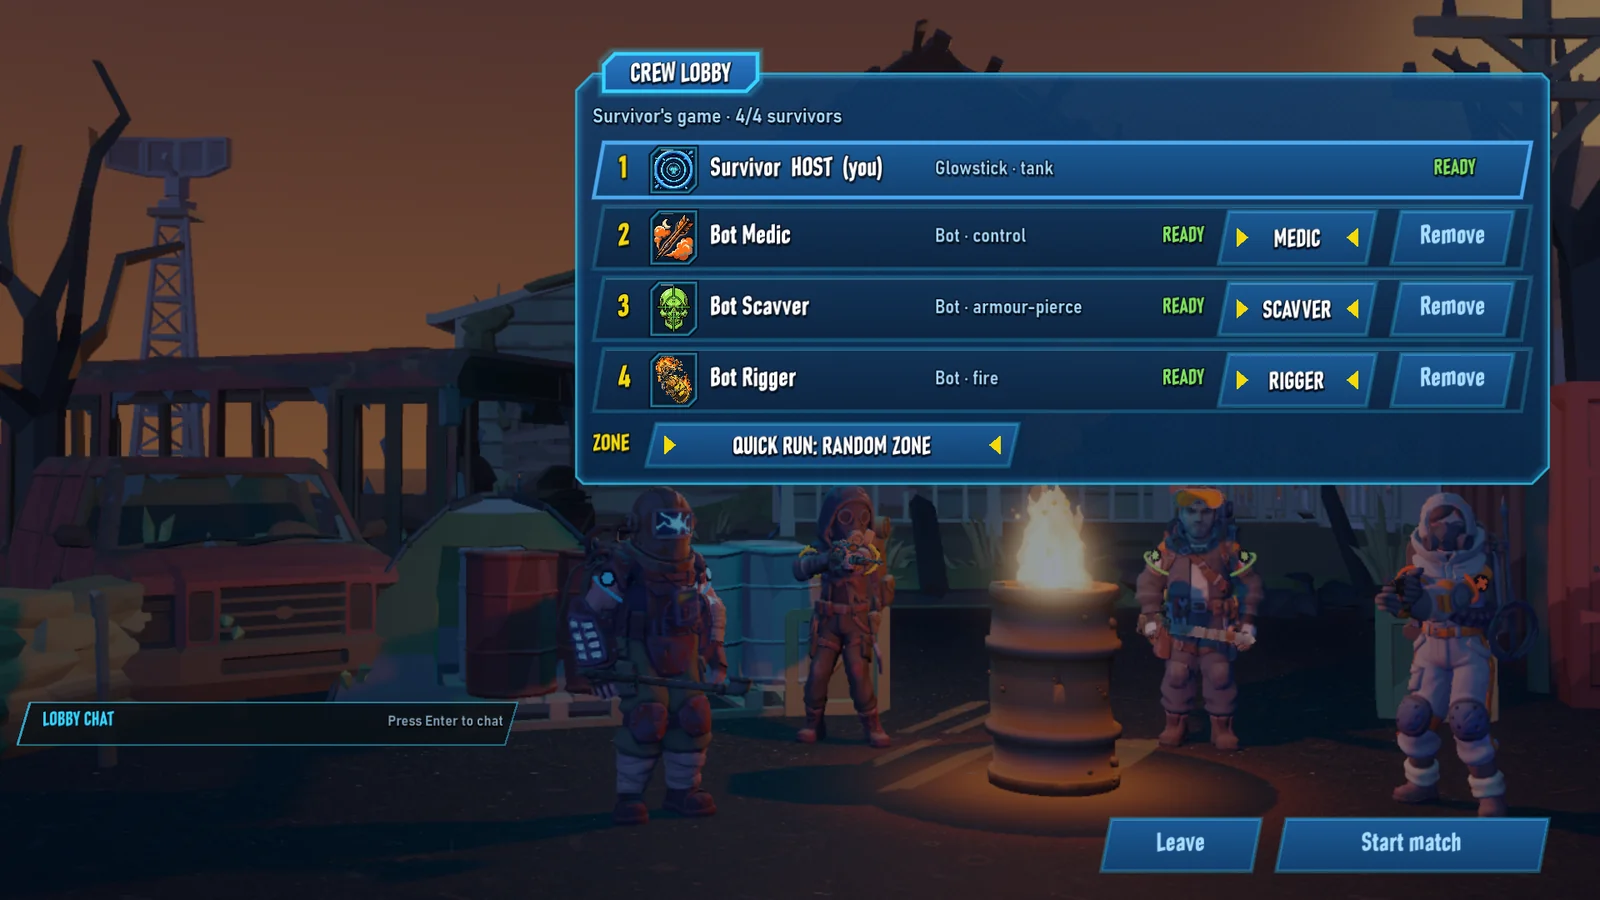
Hosting is simple. Hit Play and then Host game to open the crew lobby, which has four seats. Pick your class and skills, fill the empty seats with bots if you want them, pick a zone, and start the match once everyone is marked Ready. Friends join through Browse games, which lists Steam lobbies, LAN games it finds on its own, or a game at a typed IP. One player hosts each match, so there's no server to wait for.
Friends can also join a match that's already running. They load into the same map and drop in as a new survivor in a free seat. Bots don't get kicked to make room, so leave a seat open if you know someone's on the way. Once you're in, what you type goes to your party by default and pops up as a speech bubble over your head.
If you want to find a crew, argue about the best Meltdown setup or just tell us which class you're maining, come hang out on our Discord. For more on the dose itself, read how radiation works in DOSE, and for what happens at the beacon, see extraction in DOSE.
- #classes
- #co-op
- #combos
- #bots
- #multiplayer